Week Four
- May 23, 2018
- 4 min read
Updated: May 24, 2018
Tentacle, High Polly's and Final Assembly
For week four I focused on building the tentacle and its rig, building all the high polys for my assets, final scene assembly and checking the quality of my scene in UE4.
Tentacle
My final hero piece was the tentacle, when making it I decided I only needed one, this way I could save time modelling and sculpting the high poly replicating it in my scene as I wished using a rig to pose it.
To build the low poly tentacle I used a similar process to how I did in the block out phase, extruding a smoothed cube edge along a strait curve, when deciding how long I need the tentacle I had to measure my ship, analysing the angles at which the tentacle would wrap around making sure I wouldn’t over extend or fall short. Once I had my measurements in place I built the curve making use of the grid to keep it in a strait line. I then placed my cube at the top and extruded along the curve. Once I had the base shape I selected a face loop and extruded in order to create a flap that would encompass the suckers. To create the suckers, I used a cylinder and performed a few extrusions to get a simple sucker shape, using octopus pictures as reference. Once I was happy with the first I duplicated it four times and started manipulating its edges to create four unique suckers, from here I unwrapped all off the assets into 3 separate materials, one for the suckers and two for the tentacles as I was worried about not having enough texile density considering the size of the creature.
From here I exported the lows to added to my asset library, so that I could carry on and add my suckers to the tentacle. For the placement of the suckers I used a mell script that enabled me to place them directly on top of the vertices of the tentacle. From here I was just a matter of scale and rotation with some rearranging to make it look like a believable tentacle.

Tentacle rig
Once finished I was able to start rigging the tentacle, because I didn’t want to waste any time playing with the rig joint systems, I decided to make it act like a curve, where I could use control vertices to control its shape this was done by adding a joint for each 1.5 meters up the tentacle, then creating a curve and matching each control vertices to each joint in the skeleton. From here I was able to make an IK handle out of the curve I had created, but instead of using the default options I opted to use my own curve for more control. To do this you simple click on the joint start and end joint, then select the curve you want to be using. The final part of the process involves binding the skin of the octopus to the skeleton. Here I only changed the binding method from classic linear to, dual quaternion and applied. Due to the fact that I had modelled my tentacle in a straight line with a comparatively short distance between each joint there were no skinning issues and I did not have to paint in any skin weights at all in order to get the tentacle to deform properly.
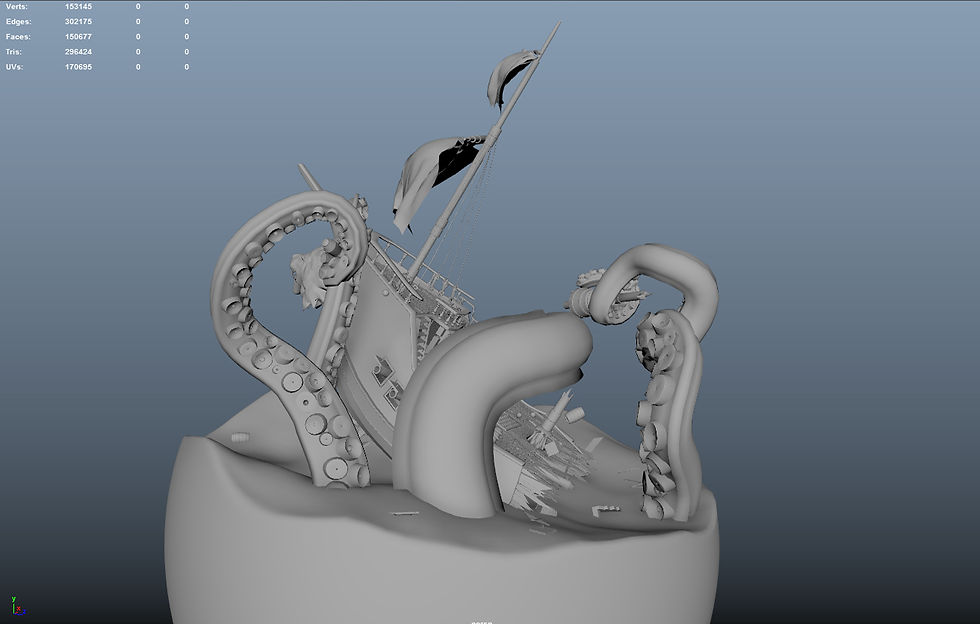
Final scene
Now able to pose my tentacle I could start populating properly with my modular assets, to polish off the environment, the focus being on creating a moment frozen in time, where debris ad ship parts were flying through the air. When posing the tentacle I stuck closely to my block out concept as I like the compositional elements. After assembling the scene, I started combining all of my meshes into their comparative sets. And exporting them out as unique objects, for my unreal scene.

Testing the unreal project by checking for uv stretching applying basic materials, making sure the light-maps were functioning without any anomalies with a decent resolution
All high Polly
For the high polys I took to grabbing images of wood from textuers.com, and converting them into black and white photos inside of photoshop. As my scene was heavily comprised of wood I made sure to make a variety of alphas to be used for detailing inside of zbrush.


My methodologies for creating the wood was similar for most of the pieces, I started by making poly groups, in order the crease the edges of the meshes to maintain a hard edge when I subdivided, then when the resolution was enough I started using the alphas to create a verity wood details in the high polys. In order to get the wood to look warped in some places I took to using the crumple brush. And for damaged edges using the trim dynamic and rock crack brushes. In order to create the banister, stand I used the radial symmetry function and using a a mix of flatten, clay built up and the damn standard brush created a stylised stand.
Tenticle
For the tentacle high poly I took to sculpting in more organic shapes using the clay build up brush, once I had the base shape I started using animal skin alphas like rhinos and elephants to get the finer surface details, the final step was to create the warts, I did this by using a simple circular spot alpha and covering its entire mass, making it so that I could sculpt in the warts and details manually. For the suckers I followed the same process, but instead used the weave brush to create a fleshier area around the centre of the sucker.

Water
The final part of the high poly would be to sculpt into the water to make it look like it was interacting with the octopus, to do this I had to separate the water into two different meshes in order to maximise resolution on the surface and avoid any unnecessary decimation or re-meshing. I then imported the ship and tentacles as a single mesh into their own subtool in zbrush so I could sculpt in waves and splashing around where the ship and tentacles were intersecting the water, using the clay build up brush followed by a surface noise. (water split pic, sculpt pic)


Comments