Week Three
- May 23, 2018
- 3 min read
Scene assembly, UV Sets, Hero Assets
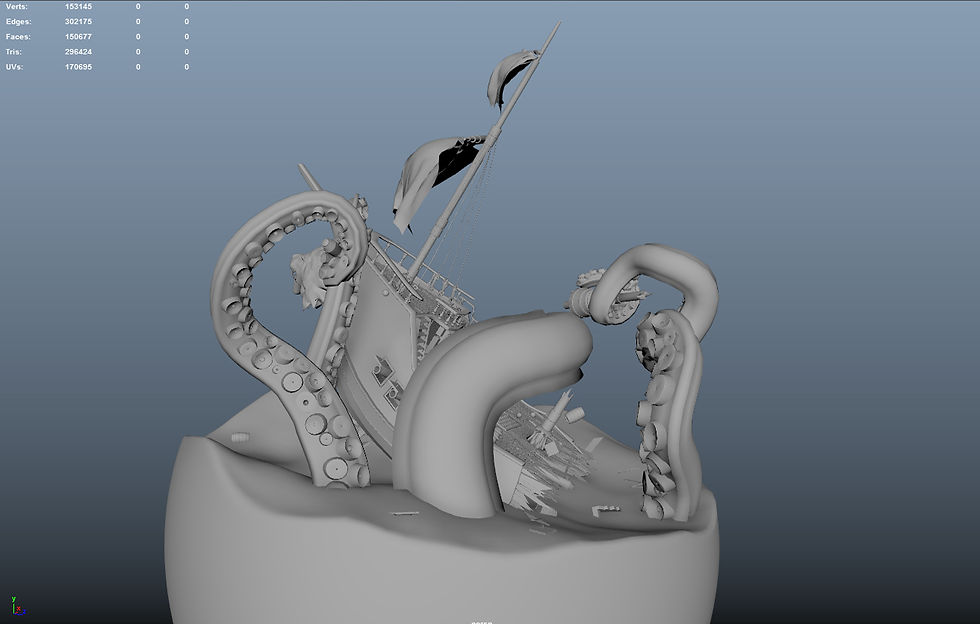
For week three I was focused entirely on getting the ship laid out in Maya with all of its basic pieces and put together an asset library organising its UVsets. This included modelling the figurehead for the ship.

Assembling the ship
As I had most of my assets contained within the same scene it sped up my process for both placement and making sets. Organising my assets into groups in the outliner and keeping the scene with cleaner naming conventions was a big help. With my block out as reference I started the process of placing my assets, getting all of the ships pieces placed without worrying about the tentacle as i could rearrange things later.
(High to Low)
Figurehead Hero Asset
The last ship asset to be constructed was the figure head, my idea to have a lion bust was inspired by the fact that I wanted it to be linked with British symbolism, at the time the British coat of arms would transition from lion to unicorn and a mix of the both. I started out by gathering as many lion references as I could, and using kuadro to keep them on screen whilst I modelled. Once I had all my pictures set up I started sculpting in Zbrush, starting with a polly mesh 3D sphere, then using the Move brush I tried to match up the basic profile for front and back. When I was happy with its basic form I started sculpting into the mesh to build the lions facial features gradually increasing the subdivisions and adding more detail
For the fur I used the Move tool on a sphere to create fluid and jagged patterns that flowed off of his head, I followed this process several times and then used a Boolean function to bring all the separate fur sub tools together. From here I started sculpting into the fur to make it more stylised. Keeping in minds that this would either be made of stone or wood.
For the low polly I decimated the highs to a point where I could bring them into maya, using the make object live function on the highs, turning them into magnetic surfaces. Then using Quad draw and the modelling tool kit I built the low on top of it working polly by polly, making sure to form a more consistent edge flow.

Once I had the low poly completed I realised I didn’t like the high polys look, so I went back into zbrush using the new low, and subdivided it up and started sculpting into it to create something more stylised.
The final step for the figure head was creating the teeth, for this I used a sphere, the clip curve tool, and the zremesher, in an attempt to keep the polly count low but the shape as nice as possible. For the low poly I decimated the mesh. (teeth pic)
I opted to have the figure head with its own uv tile as It is a prominent figure, maintaining as a few uv islands as possible.

UV Sets
once I had the figurehead I was able to complete my asset library and start organising my sets, already having object sets in place helped speed up this part of the process. When creating my uv sets I made sure to keep my texile density actuate, during this process I used the information i found to figure out how many materials I needed for the bigger objects. Like the ship hull and the figure head. Unlike the deck set that has over ten items.
The ship hull as a result was split in half and Four 2k UV sets were made for each quarter, making it so that I could mirror over the Uvs. Saving time on having a to texture four other other materials.


Comments